I had been meaning to redo the Self Portrait I did in college in 2014 as I had changed visually quite a bit over those 2 years. I have always had the idea to go very abstract with it, however I never really knew what to do with it. I knew I wanted to let it be a good visual expression of myself however I was never sure what that would mean visually.
While shooting a friends head shots I decided to take the opportunity to have him take photos of me which I could illustrate.
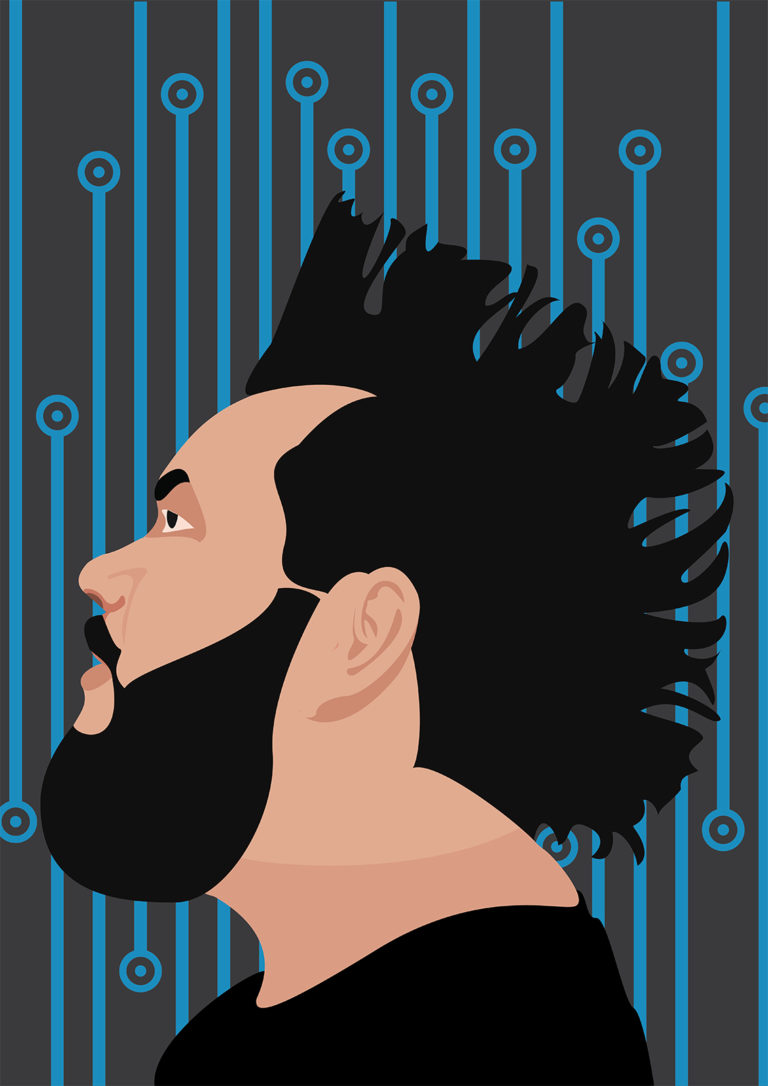
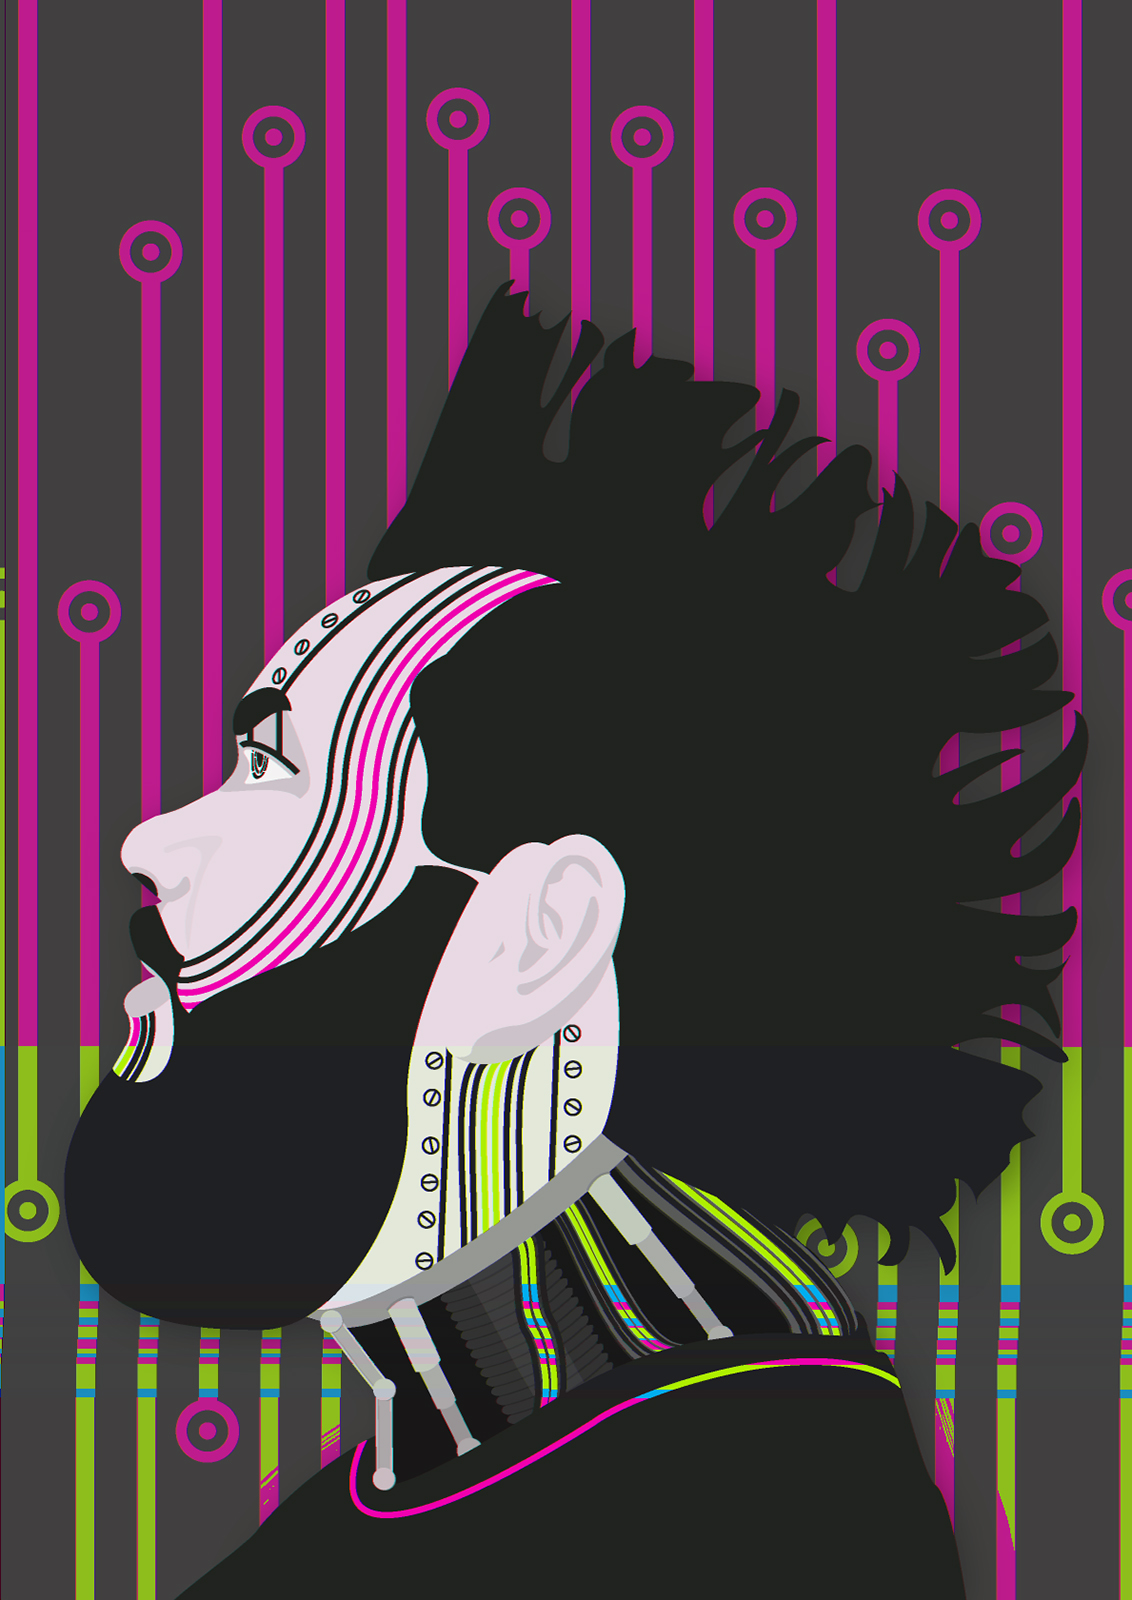
I was unsure of exactly what i wanted to do with it but I decided to do a basic flat illustration first to get the basic face down. I had ideas to break the image apart and make wild shapes around it. I also wanted to make things more in the Cyberpunk sub-genre so I decided on the initial background in the top image. However this did not feel like enough.
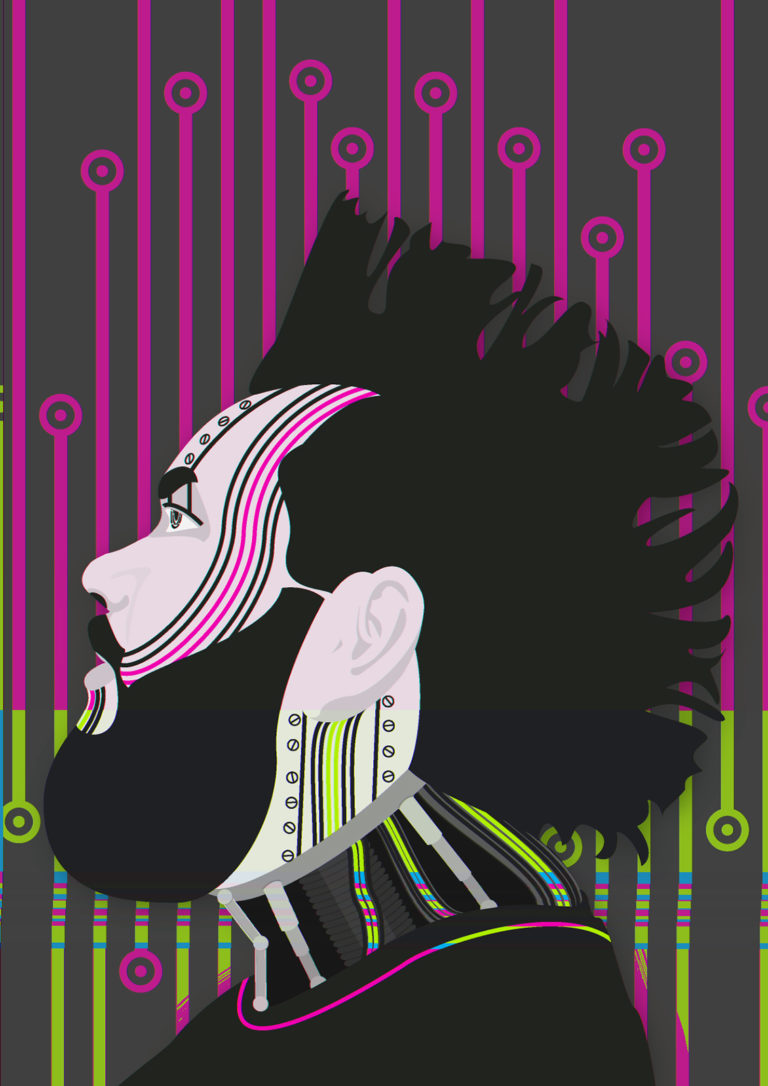
Once I completed the initial basic flat illustration I decided I wanted to know what I’d look like as a robot. I worked with this idea as it still fit the base line of my requirements for this project. It still suit as an expression of myself but also worked as an excuse to throw in more activity into what was a plain face.
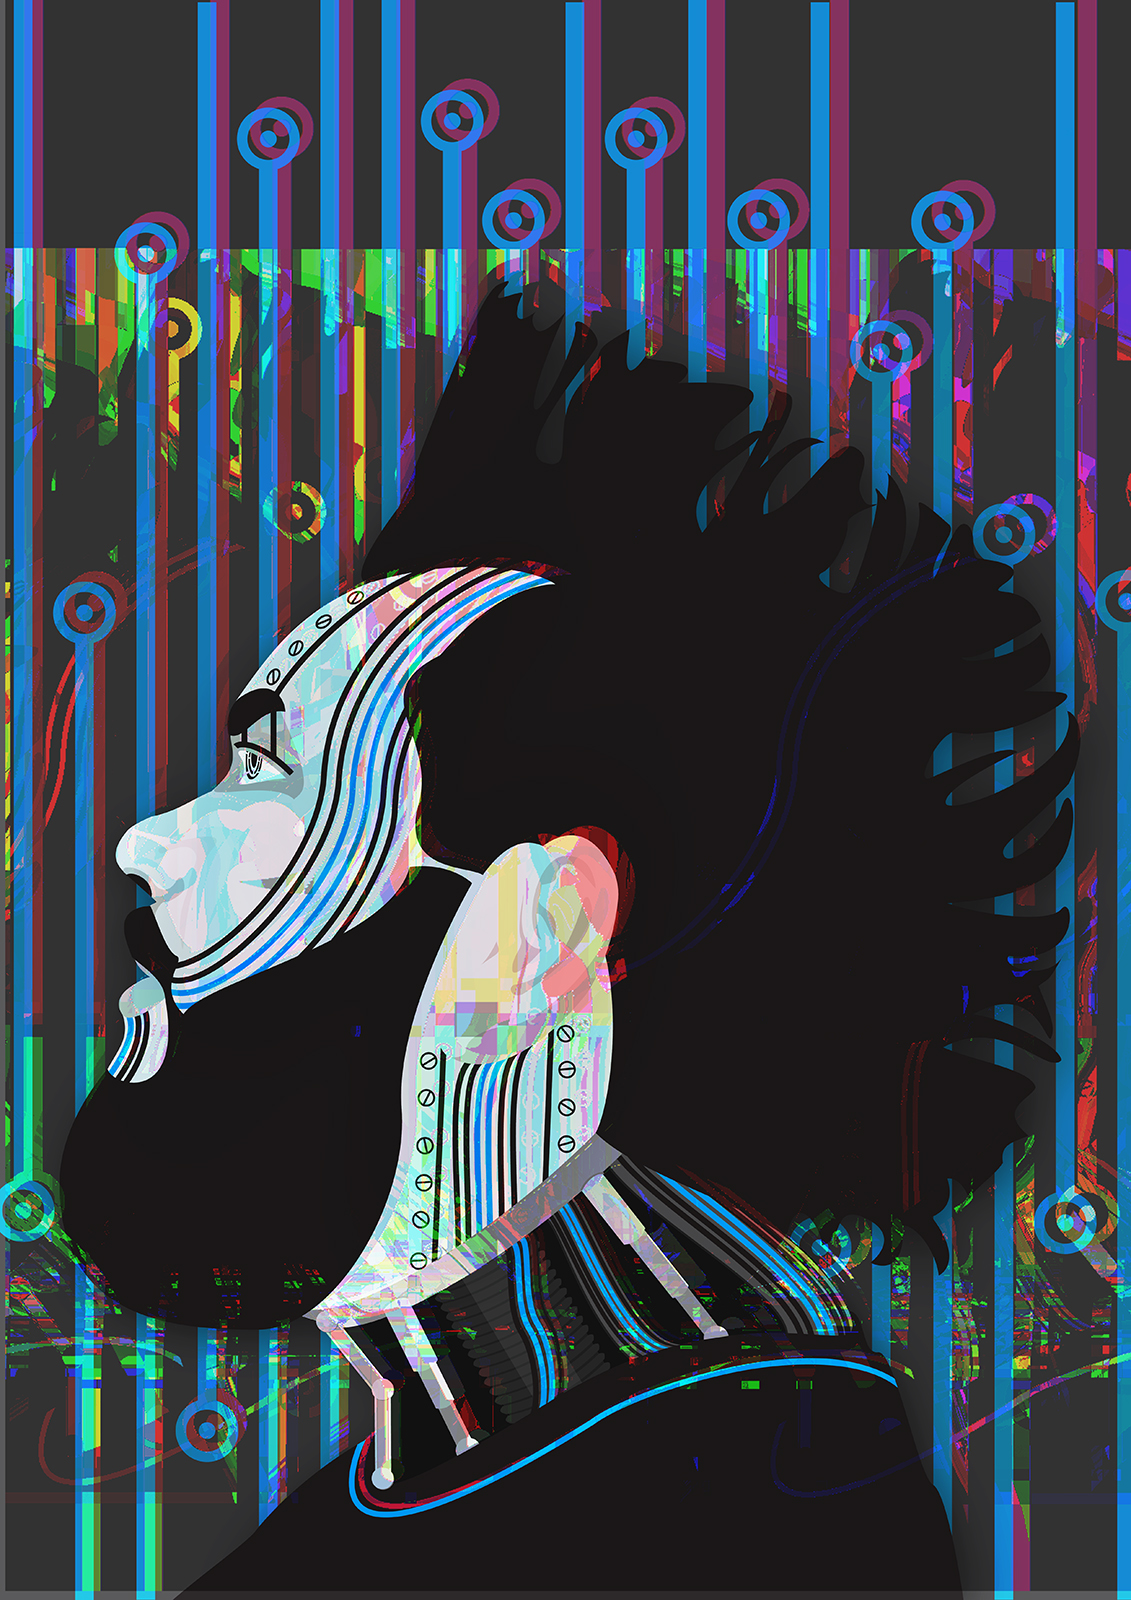
I had been experimenting with Glitch Art a small amount before I started this project. So I had also decided I wanted to experiment further with using different techniques I had learned, along with practising new methods, to achieve a glitched look from a flat illustration.
Generally when forcing an image to glitch the methods I learned prefer a photo, when a flat illustration is used it tends to follow a few certain paths, some allow for a really messed up image, some essentially copy and paste the image randomly, some will just mess with colours.
Of the techniques I had used, few would still keep a visible portrait while still being sufficiently glitched or they would barely mess the image up. The main image is the result of the multiple techniques of glitching layered.
Many of the better results came from manipulating the image in the free audio software Audacity. I had taken the image as a .bmp imported it to Audacity making it think it was an audio file, then I had played with the sound effects provided by Audacity and exported the result to another .bmp. I repeated this step a number of times until I felt I had enough resources to play with. I had also taken the original .bmp and opened it in notepad where it would attempt to translate the image to a written format. I would modify the text which would glitch the image.
I took each of these glitched images back into Photoshop where I would then layer the glitches in a manner to allow the portrait to shine through clear enough but to have a clear emphasis on the glitched results. This was achieved by layering the glitches under the original illustration using a multiply blending mode on the portrait and a duplicating the portrait with other blending modes to strengthen the portrait.
I am still quite proud of how this turned out. As I mentioned when Glitching an image the techniques work best with a photo with a lot of details and colours. So I was very happy with the results I got. Applying all of the glitches really allowed my portrait to remain the focus over the glitch.
Self Portrait 2016